The chances of dying in a car crash are statistically low on any single trip, but over a lifetime, the risk becomes significant. National traffic safety data consistently show...
Read more What Are the Odds of Dying in a Car Crash?
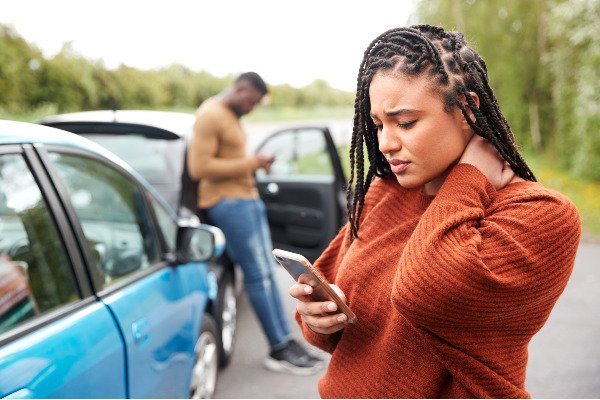
When you are involved in an auto accident, there are several steps that you should try to take before you leave the scene – assuming you are physically able to do so. One of these steps is taking photos of the crash site.
The reason why accident victims should take photos is that physical evidence of liability can disappear quickly, and photos taken at the scene can, themselves, become evidence in accident victims’ claims for financial compensation. For example, photos taken at the scene of an auto accident can preserve information including:
Photos taken at the scene of the crash can also capture information that may be available from other sources – but which may be more difficult to obtain elsewhere, and which may also have the potential to disappear. For example, while each vehicle can be inspected to determine whether its airbags deployed (assuming the inspection is performed before repair work begins), photos from the scene of the accident can confirm this without an inspection being necessary.
Photos can be used to document numerous other important facts as well; and, when it comes to proving liability for an auto accident, a picture truly can be worth 1,000 words. With this in mind, here are 10 tips for taking (and preserving) photos after a serious or fatal vehicle collision:
Our first tip is simply to take lots of photos. You truly cannot take too many, and standing on the side of the road after an accident is not the time or the place to be worrying about preserving some of your phone’s storage capacity. At the scene of the crash, your sole focus should be on collecting as much information as you possibly can before you leave.
You will want to thoroughly document the damage to each of the vehicles involved in the accident – including your own. Take multiple pictures of each vehicle, including closeups of damaged areas as well as photos that fully display the extent of the damage from farther back. The one major caveat here (and with all of these tips) is that you should not put your own personal safety at risk under any circumstances in order to take a photo.
Even if you write down each vehicle’s information, it is a good idea to take photos of license plates and make and model badges as well. If you lose your piece of paper (or if you transcribed a license plate number incorrectly), your photos will still contain the information your attorney needs in order to identify the other drivers and pursue just compensation on your behalf.
Next, take photos of any traffic signs or signals in the vicinity of the crash. But, again, do not put your safety at risk. If it is not safe to walk along the road or cross the street in order to photograph a sign that is facing away from you, then simply take a picture from the back so that your attorney can identify it for purposes of his or her subsequent investigation.
In addition to photographing any traffic signs or signals specifically, also photograph the general surrounding area. Here, you don’t need to focus on anything in particular – just concentrate on thoroughly documenting the general vicinity of the crash.
In the aftermath of an accident, you’re not alone—we’re here to support you every step of the way and fight for the compensation you deserve. Contact us now. Contact Us
For all of the items we recommend photographing above, try to take photos from multiple angles. Walk all of the way around each vehicle (if you can), and take photos from multiple vantages in and around the crash site if it is safe to do so.
Similar to photographing each vehicle’s license plate and badges, it is also a good idea to photograph each driver’s insurance card. The same is true of the police report and the driver’s licenses or business cards of any witnesses who are willing to provide them. Even if you write names and numbers down or obtain a physical copy, it is still good to have photos as a backup, just in case.
Speaking of backup, when you get home, make sure your photos are not solely stored on your phone. Hopefully, you won’t lose or break your phone; but, if you do, you will want to make sure that your photos from the scene of the accident are still available.
In this same vein, you should not delete any of the photos you take at the scene of the accident. This is true no matter how duplicative or superfluous they may seem. Your attorney will want to see every single photo that you took, and he or she can decide what is or is not relevant to your auto accident claim.
 Finally, while your photos may be interesting and your accident is certainly a major event in your life, you need to resist the temptation to post your accident photos on social media. At this point, the only person with whom you should be sharing your photos is your attorney. The time to tell your story will come; but, for now, you should keep your photos to yourself so that the insurance companies do not have the opportunity to try to use them against you.
At D’Amore Law Group, we represent accident victims throughout Oregon and Washington in auto insurance claims and third-party litigation. If you have been injured in an accident and would like to speak with an attorney, we encourage you to call us directly or contact us online for a free consultation.